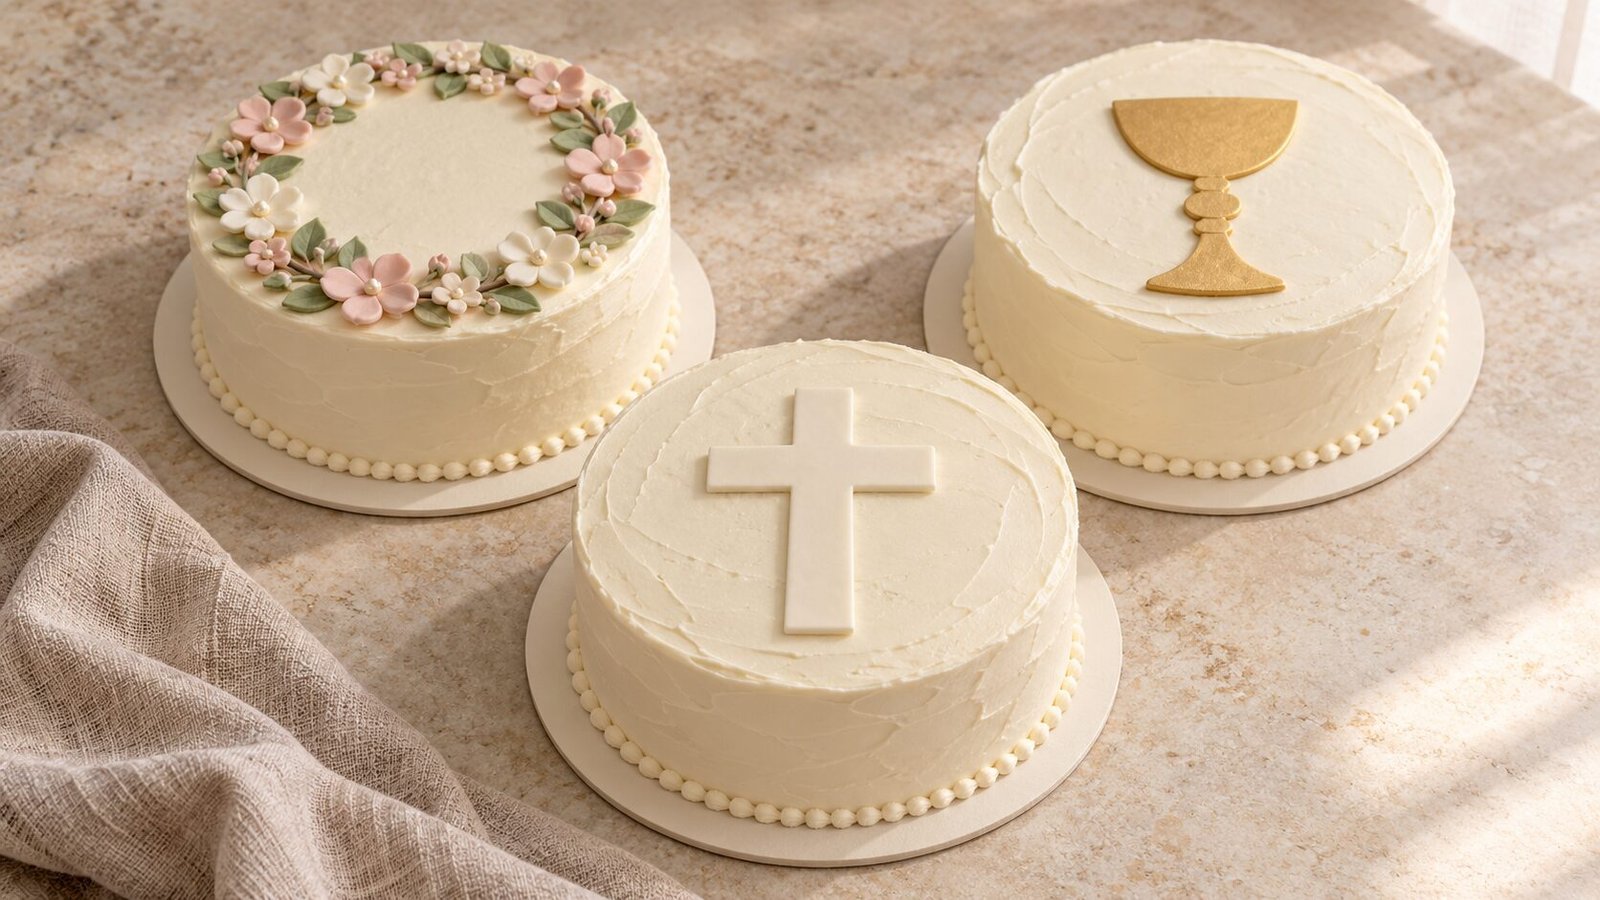
A First Communion cake can be a thoughtful part of a family celebration without requiring several tiers or elaborate sugar sculptures. A neatly covered cake, a meaningful decoration, and a little space for the child’s name can create a lovely centerpiece.
These First Communion cake ideas offer five different decorating approaches, from a simple fondant cross to a buttercream floral design. Each includes a materials list, an estimated decorating time, and practical steps.
The designs are intended for the family celebration accompanying the occasion. Choose the colors and motifs that feel appropriate to your family, and involve your child in choosing the details where possible.
Start with One Simple Cake
All five designs use the same starting point:
- One filled, round cake approximately 8 inches (20 cm) across and 3 inches (7–8 cm) tall
- A rigid, food-safe cake board approximately 10 inches (25 cm) across
- Approximately 700–900 g ready-to-use buttercream for a thin crumb coat and an outer coating
- Additional buttercream or decorations as specified below
The buttercream quantity is an estimate. The cake’s exact height, coating thickness, and your decorating technique will affect how much you need.
Use a cake recipe you already know, or purchase a plain cake suitable for decorating. These are decorating instructions, rather than recipes for baking the cake layers. Avoid trying an unfamiliar cake recipe and a new decorating technique for the first time on the day of the celebration.
Useful equipment includes an offset spatula, a cake scraper, piping bags, a small round piping tip, and a large star tip. A turntable is helpful but optional.
Prepare the Surface
Start with fully cooled cake layers and a suitable filling. Secure the assembled cake to its board with a small amount of buttercream.
Spread a thin crumb coat over the top and sides to trap loose crumbs. Chill until the coating feels firm, usually around 20–30 minutes, depending on the buttercream.
Apply the outer coating and smooth it with a spatula or scraper. A gently textured finish is perfectly suitable; you do not need completely straight sides.
The times below begin with this covered cake ready to decorate. They exclude baking, filling, crumb coating, and chilling.
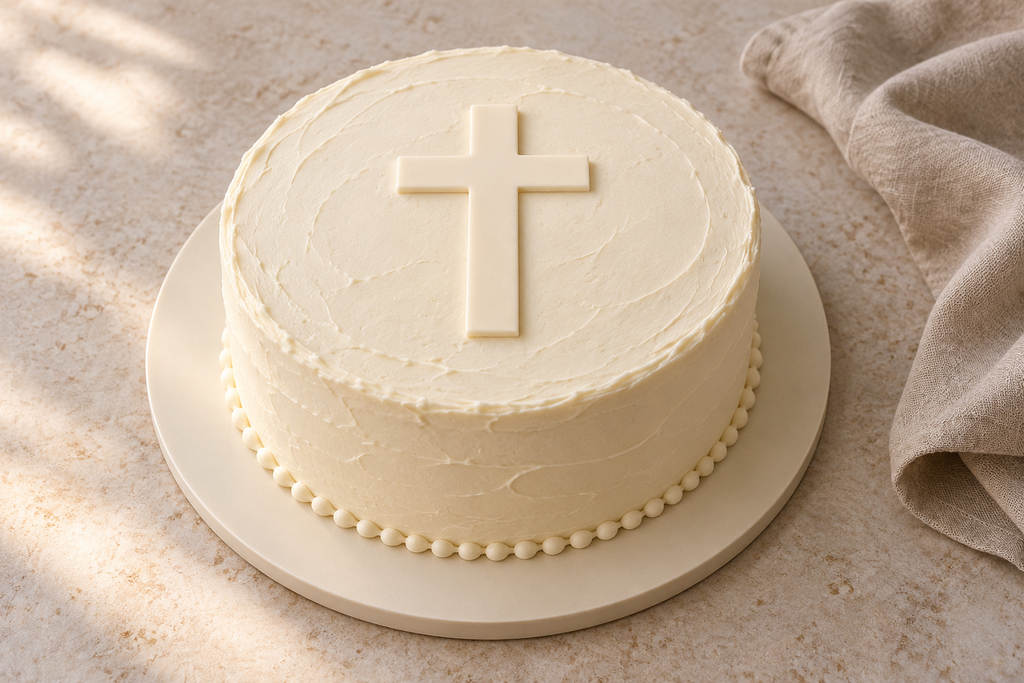
1. White Buttercream Cake with a Simple Cross
Difficulty: Beginner
Decorating time: Approximately 20–30 minutes
This design leaves most of the cake undecorated, with a flat edible cross as the focal point. White or ivory buttercream creates a quiet background, while a small piped border finishes the base.
What You Need
- One buttercream-covered base cake
- Approximately 60 g ready-to-roll fondant
- A cross-shaped cutter approximately 8–10 cm tall
- Approximately 100 g additional buttercream
- A piping bag fitted with a small round or star tip
- A small rolling pin
How to Decorate
Roll the fondant approximately 3 mm thick on a surface prepared according to its package instructions. Cut out the cross and remove the surrounding fondant.
Let the cross firm briefly until it can be lifted without stretching. Keep it flat rather than attempting a freestanding decoration.
Mark the center of the cake lightly with the tip of a clean skewer. Lift the cross with a small spatula and place it flat on top. If the buttercream has crusted, use a few tiny dots of fresh buttercream underneath to hold it in place.
Pipe a simple border around the bottom edge, using small dots or stars.
Beginner tip: Check the cutter’s size against a paper circle representing the cake before buying or cutting the decoration. Leave enough space around the cross for a balanced appearance.
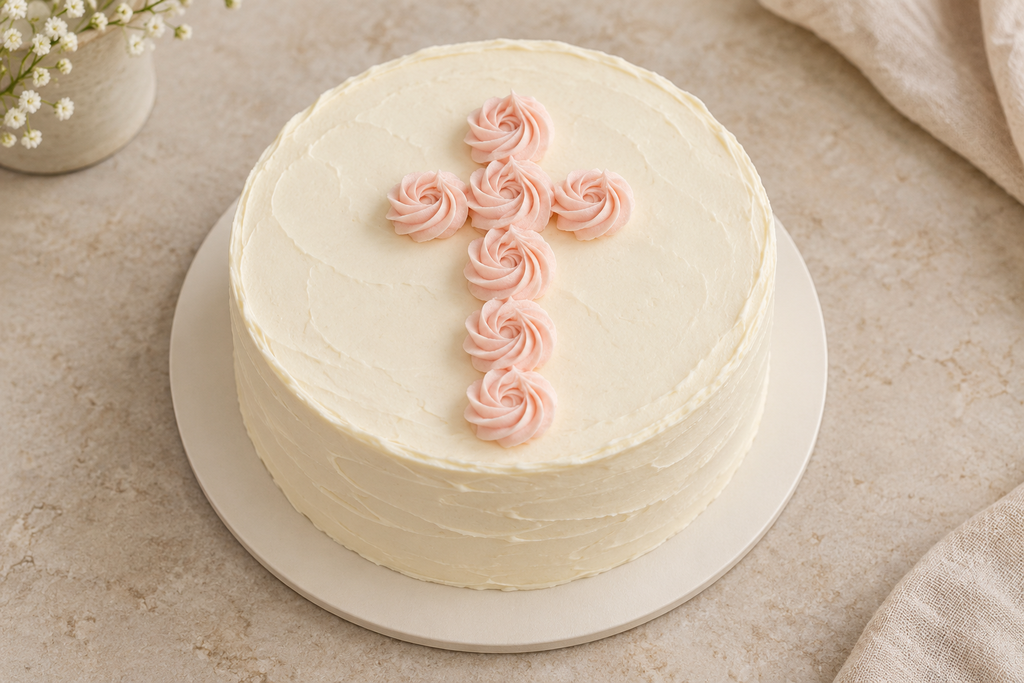
2. A Cross Made from Buttercream Rosettes
Difficulty: Beginner with piping practice
Decorating time: Approximately 30–45 minutes
A cluster of small rosettes creates the cross directly on the cake’s surface. This approach avoids carving the cake into a different shape.
What You Need
- One buttercream-covered base cake
- Approximately 180–220 g additional buttercream
- A large open-star piping tip and piping bag
- Optional food-grade gel coloring
- Baking paper for practice
How to Decorate
Keep the buttercream its natural color or tint it with a small amount of gel coloring.
Practice a few rosettes on baking paper. Hold the piping bag upright, begin at the center, and pipe a short spiral outward. Stop squeezing before lifting the tip away.
Lightly mark a cross on the cake with a clean skewer. Plan for approximately five small rosettes in a vertical line, with one on either side of the second rosette from the top. The exact number will depend on their size.
Pipe the rosette at the intersection first, then work outward along the arms and down the stem. Fill small gaps with piped stars if necessary.
Beginner tip: If the rosettes lose their ridges, the buttercream may be too warm or soft. Adjust its temperature or consistency according to the buttercream recipe or product instructions before continuing.
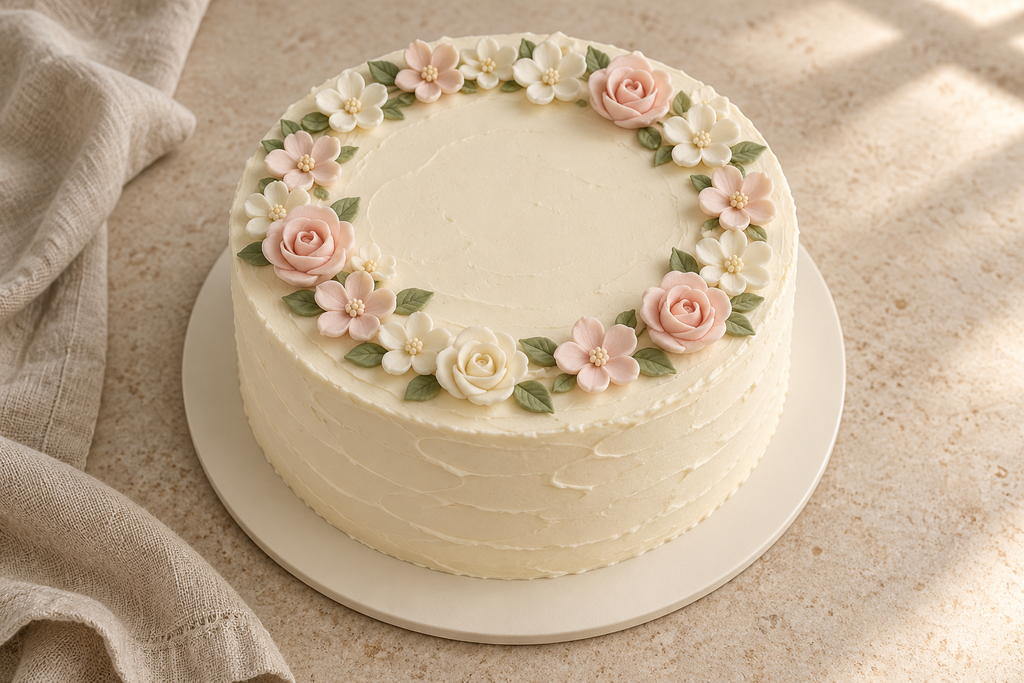
3. An Edible Flower Wreath
Difficulty: Beginner
Decorating time: Approximately 20–30 minutes
A ring of edible flowers leaves the middle of the cake open for a short message or a small cross. Ready-made decorations make this manageable without advanced flower-piping skills.
What You Need
- One buttercream-covered base cake
- Approximately 12–16 small, ready-made edible sugar flowers
- Optional edible sugar leaves
- Approximately 50 g additional buttercream for attaching decorations
- A small paper template for planning
Choose flowers explicitly sold as edible, without wire stems or other non-edible supports. Check ingredient and allergen labels.
How to Decorate
Draw a 20 cm circle on paper and arrange the decorations within it to plan the wreath. Mix a few different flower sizes, keeping the center clear.
Transfer the arrangement to the cake one flower at a time. Attach each with a small dot of fresh buttercream, placing the larger flowers first and filling gaps with smaller ones.
Keep the flowers slightly inside the top edge so they are supported by the cake.
Beginner tip: Follow the decoration supplier’s storage instructions. Some sugar decorations soften or lose their shape when exposed to moisture, so they may be best added shortly before serving.
4. A Personalized Name and Date Cake
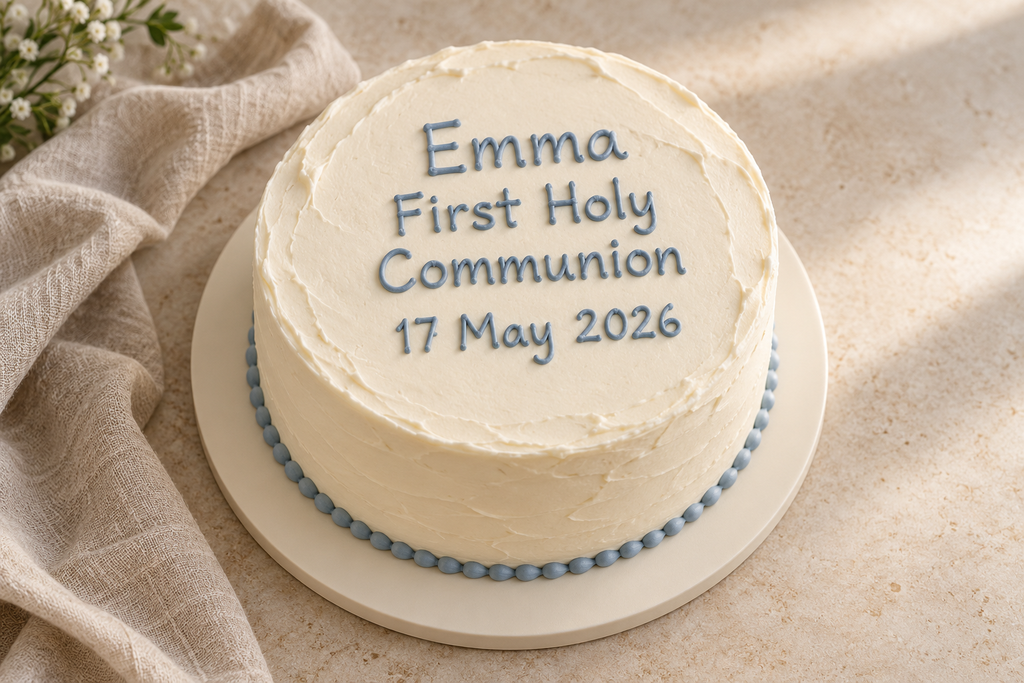
Difficulty: Beginner with lettering practice
Decorating time: Approximately 30–45 minutes
The child’s name and celebration date can provide all the decoration the cake needs. A simple border frames the message.
What You Need
- One buttercream-covered base cake
- Approximately 100–150 g additional buttercream
- A small round piping tip and piping bag
- Optional contrasting food-grade gel coloring
- Baking paper for lettering practice
How to Decorate
Write the intended message on paper first. A short name, “First Holy Communion,” and the date may fit, but avoid crowding the surface.
Practice the lettering on baking paper with buttercream. Use simple printed letters if joined handwriting feels difficult.
Lightly mark the position of each line on the cake. Pipe slowly, keeping the tip just above the surface and allowing the buttercream to settle into place.
Finish with a restrained border of dots or stars.
If piping letters feels too demanding, use ready-made edible letters or a professionally printed edible plaque made with food-grade materials.
Beginner tip: Check the spelling and date twice before decorating. For a long name, use fewer additional words so the lettering remains readable.
5. White and Gold Cake with an Edible Chalice Motif
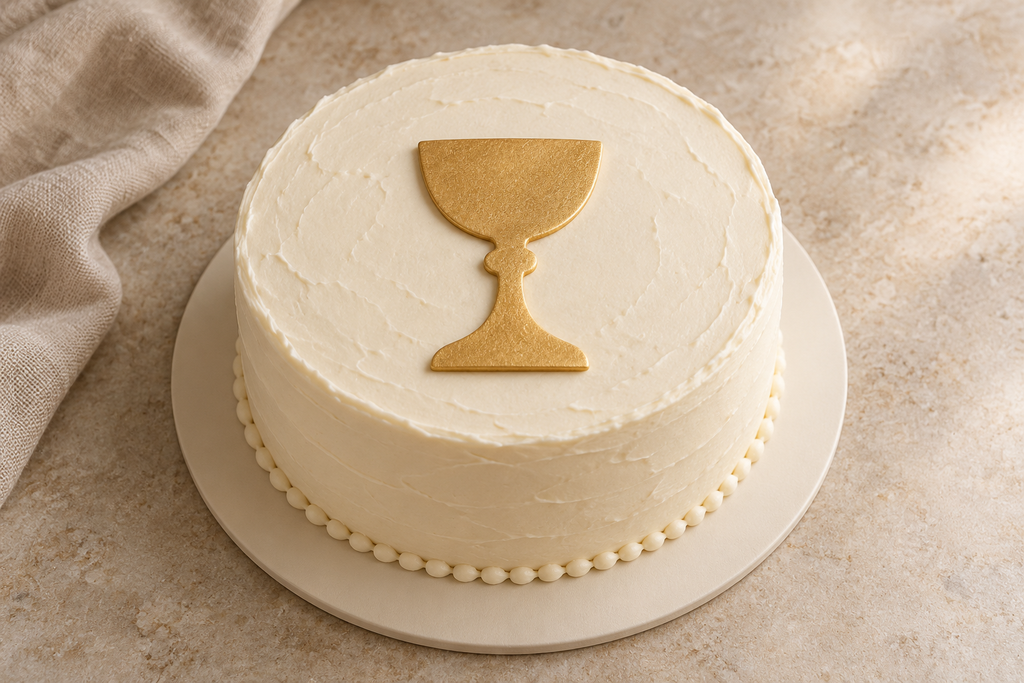
Difficulty: Beginner
Decorating time: Approximately 20–30 minutes
A flat edible chalice decoration gives this cake a clear focal point. A small amount of gold detail is enough; the whole cake does not need a metallic finish.
What You Need
- One buttercream-covered base cake
- One flat edible chalice decoration approximately 8–10 cm tall
- Approximately 80–100 g additional buttercream
- Optional edible gold paint suitable for the chosen surface
- A food-use decorating brush
- A piping bag and small tip
How to Decorate
Choose a flat fondant decoration or edible printed plaque and follow its application instructions. Check that any wafer-paper or icing-sheet decoration is suitable for the cake’s coating.
Position the motif in the center or slightly above it, leaving space for a name if desired.
If adding gold paint, use it only on compatible surfaces and follow the product directions. Allow painted decorations to dry as instructed before positioning them.
Pipe a small border around the cake’s base to finish.
Beginner tip: Use only gold products explicitly labeled edible and intended for food decoration. “Non-toxic” or “for decorative use only” does not mean suitable to eat.
Planning, Storage, and Transport
Choose the design before purchasing decorations. Check that you have a cake box wide and tall enough for the finished cake and its board.
Follow the storage requirements of the cake’s filling, frosting, and decorations. A cake containing a perishable filling still needs appropriate refrigeration, even when the outer decoration looks stable. Ask the bakery for storage instructions if using a purchased cake.
Keep any non-edible accessories separate from food unless they are designed for the intended food-contact use. Remove non-edible decorations before cutting and serving.
Transport the cake in a snug box on a clean, flat, non-slip surface. Keep it cool and out of direct sunlight. Add delicate decorations at the venue when practical.
A Final Note from Adam
I am still building my confidence in the kitchen, so I appreciate ideas that can be broken into small, manageable steps. For a meaningful family occasion, I would rather choose a design I can approach calmly and leave enough time to enjoy the day.
These First Communion cake ideas give you room to personalize without making every detail complicated. A carefully placed cross, a favorite color, or the child’s name can be enough.
A slightly uneven border does not take away from the thought behind the cake. Choose a design that suits your experience, practice the unfamiliar part beforehand, and give yourself time.
Editorial and image note: These decorating plans were developed with AI assistance and have not been independently tested on assembled cakes for this article. Quantities and times are estimates. Any images identified as AI-generated are design illustrations, not photographs of cakes made or tested by the author.
Decoration Safety Reference
For guidance on edible glitter and decorative dusts, see the FDA’s advice for home and commercial bakers. This resource supports the decoration-safety guidance and does not represent endorsement of these designs.